Prerequisites
- This app is intended for use by existing Yello customers.
- To host your event via a Zoom Meeting, you must have a Zoom account.
- If you are not sure if you have a corporate Zoom account, consult your IT Admin.
- To host your event via a Zoom Webinar, you must be a Licensed user with the Zoom Webinar Add-on.
- If you are not sure if you have a license, sign in to your Zoom account at https://zoom.us/ and go to the Webinars tab.
- If you do not have a license, Zoom provides information about Webinars and advises you to contact your IT Admin to enable you to host.
Creating Your Virtual Event with Zoom Video Conference Details
If you’re wondering how this feature changes the way you create a virtual event in Yello – it doesn’t! You follow the same event creation process, there will just be a few great enhancements along the way to make the experience better and more efficient. Here are the basic instructions to create your virtual event in Yello with Zoom video conference details.
- Sign in to your Yello web portal.
- Go to Event Management > click Create Event
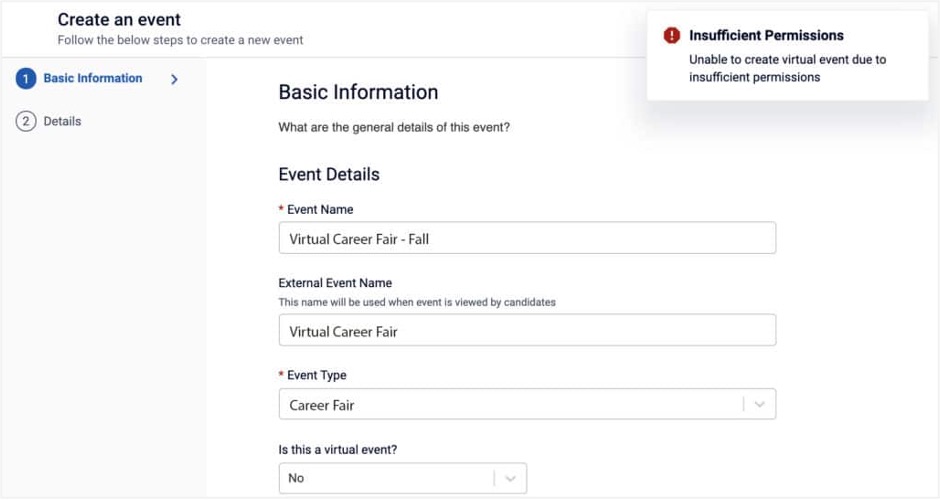
- Fill in the event’s Basic Information
- Select Yes in the “Is this a virtual event?” field
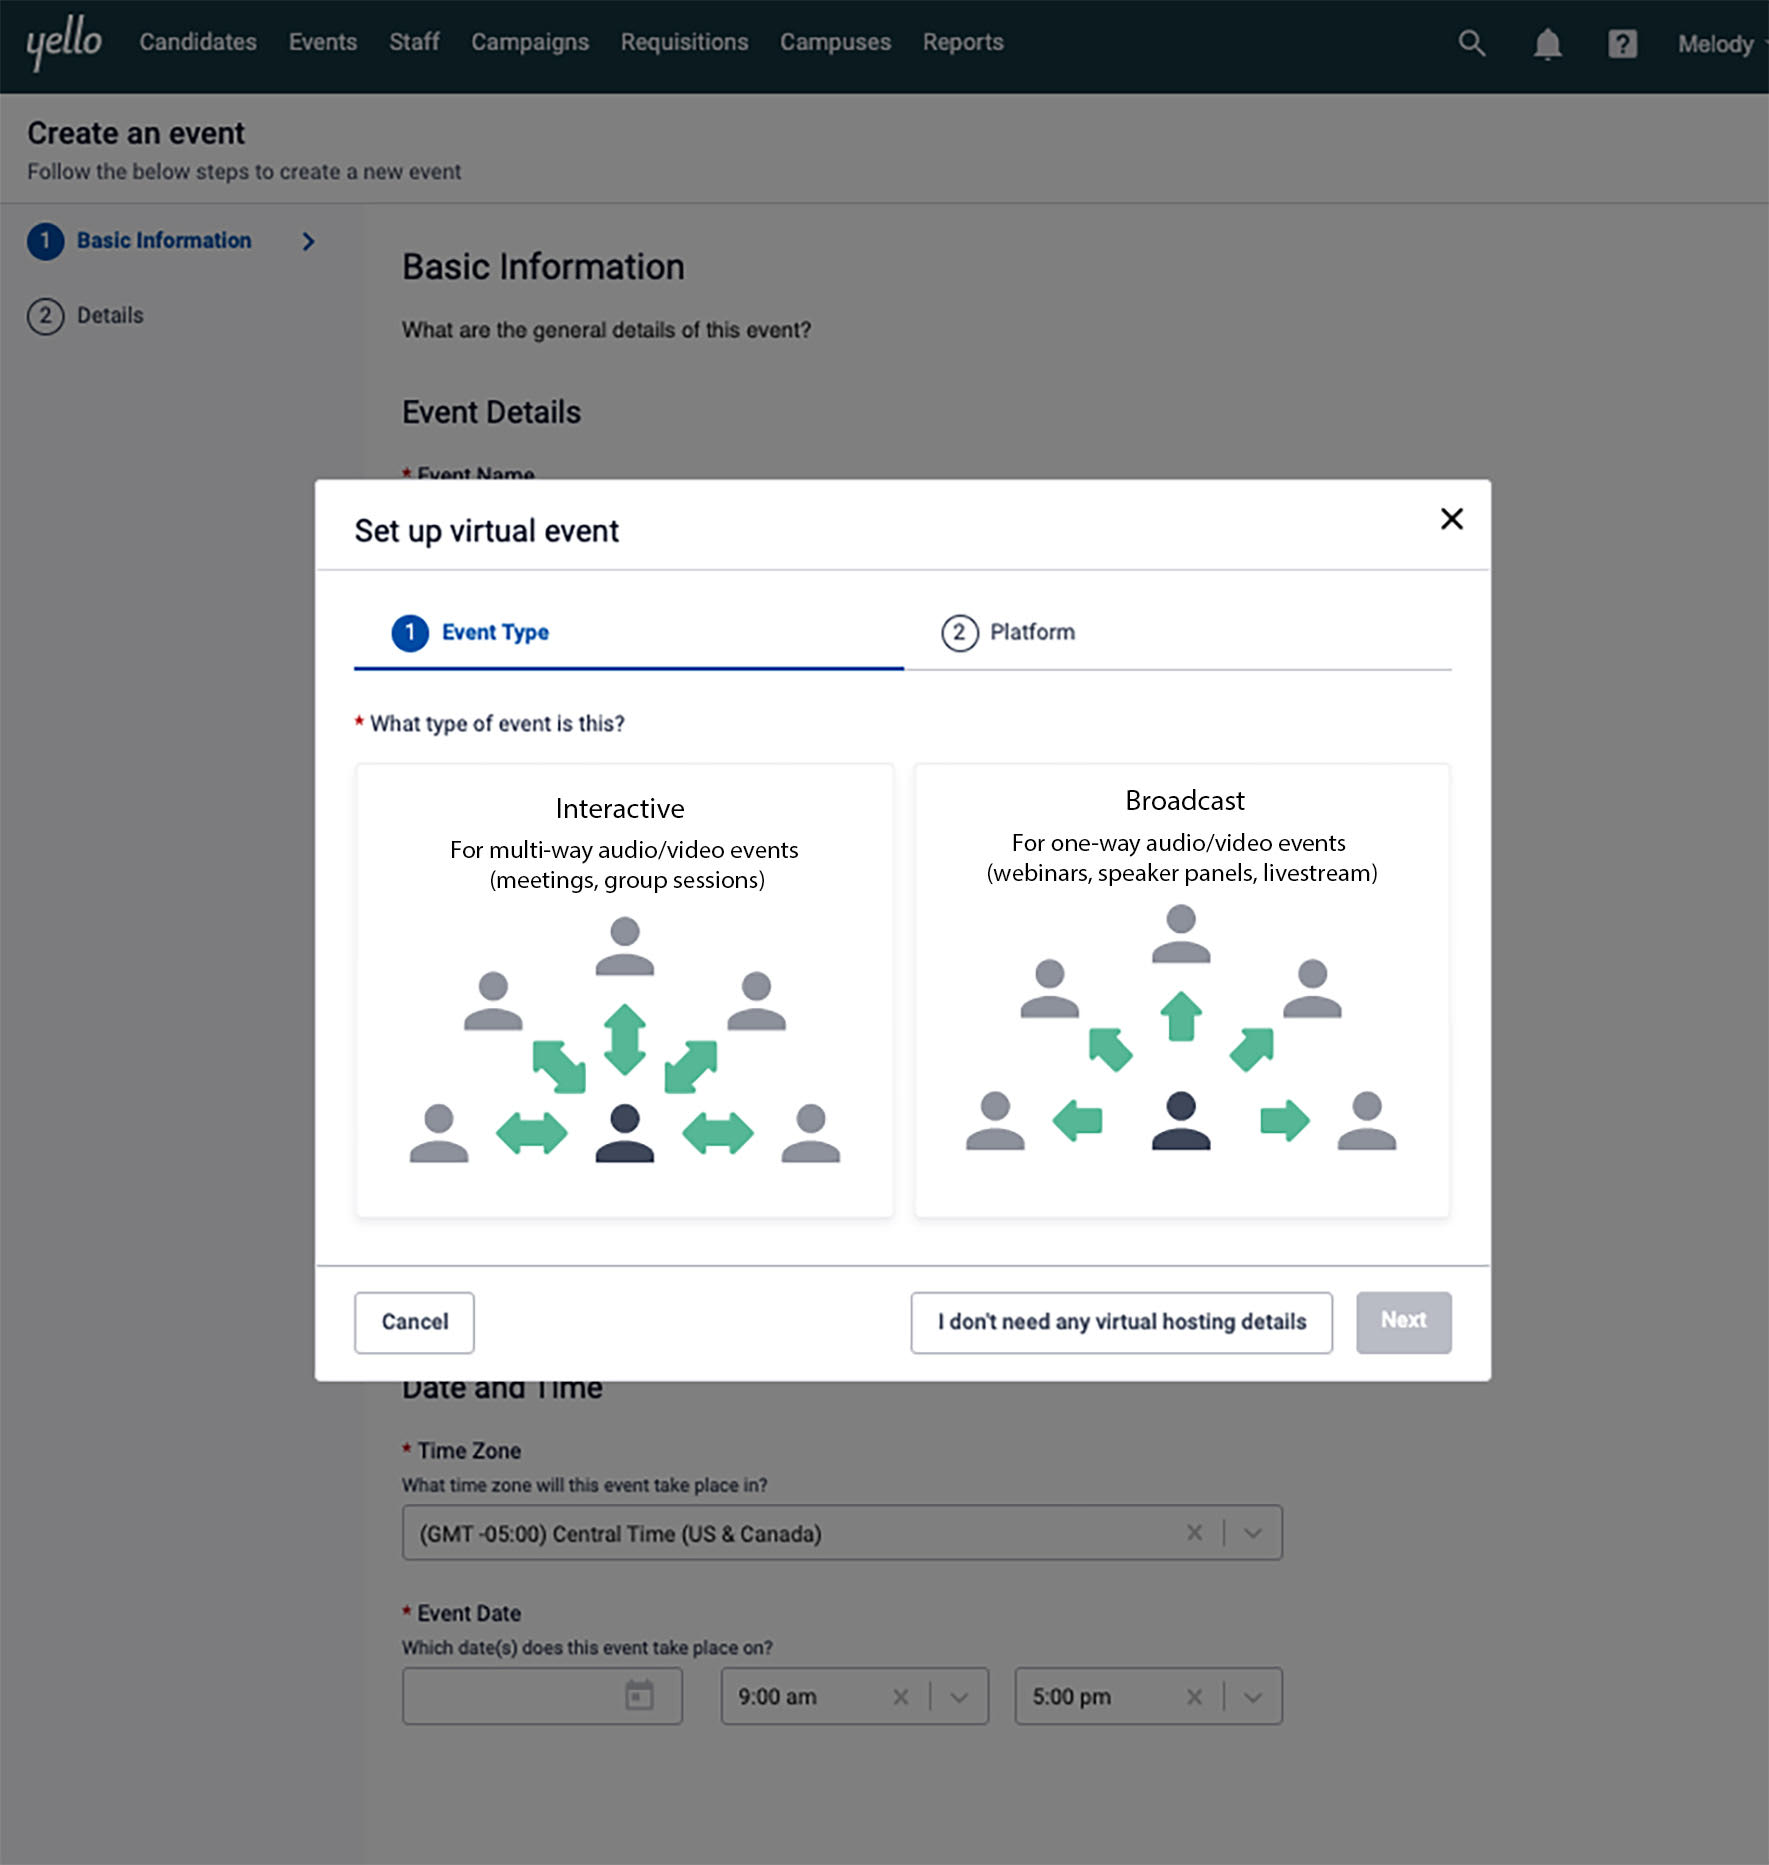
- In Set Up Virtual Event step 1, select Event Type:
- For a Zoom Meeting – Select “Interactive” (for multi-way audio/video events such as meetings or group sessions where hosts and attendees both have audio and video ability)
- For a Zoom Webinar – Select “Broadcast” (for one-way audio/video events such as webinars, livestream, or speaker panels where attendees only listen)
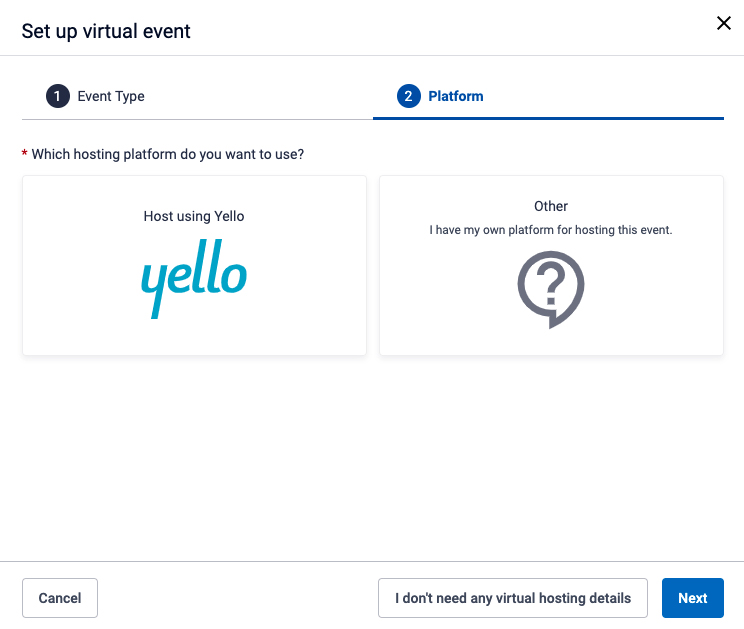
- Step 2, select the video conference platform – Host using Zoom > click Next
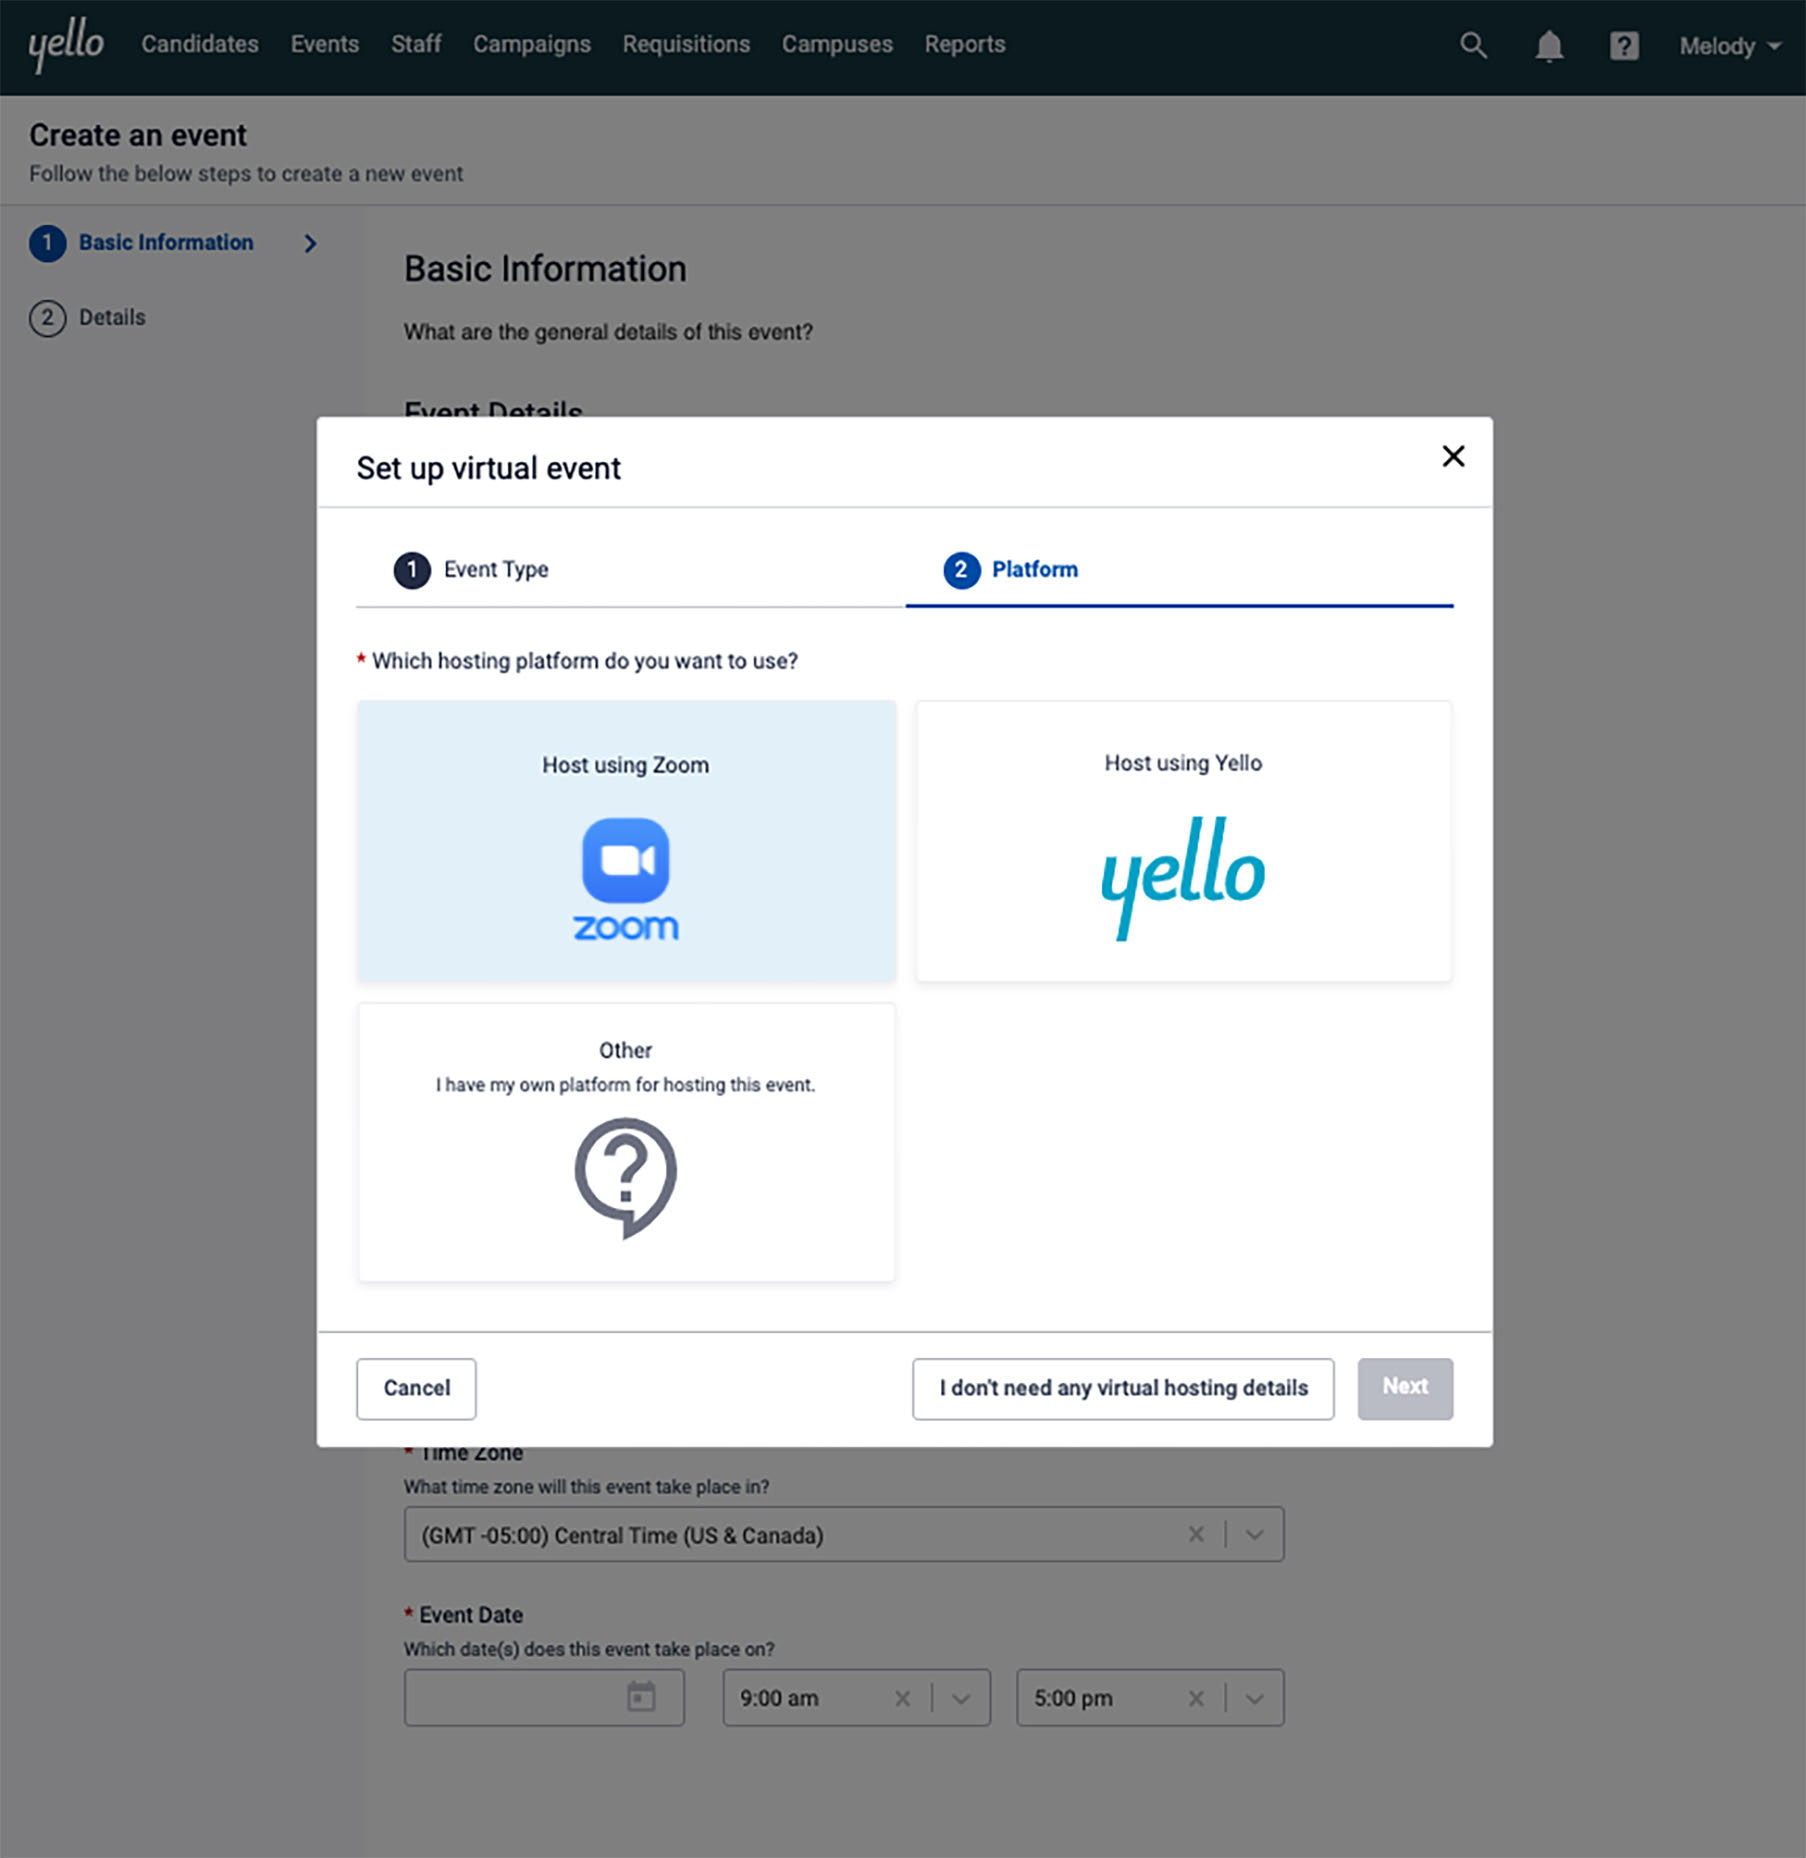
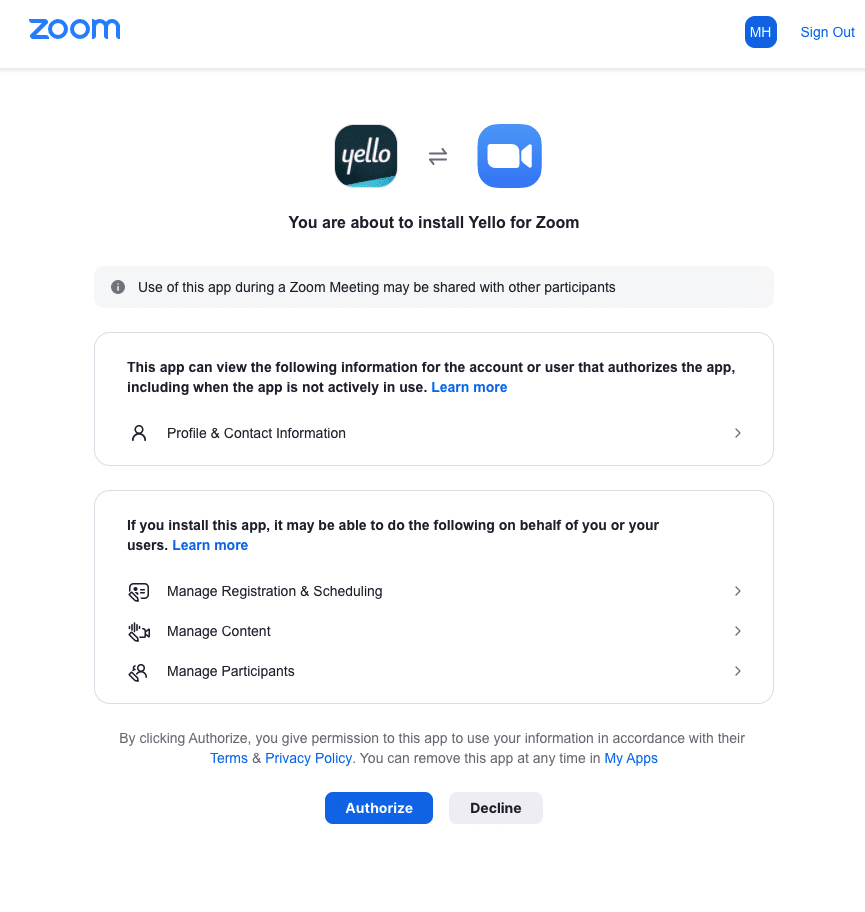
- If this is your first time selecting Zoom as your platform, you will be asked to give Yello authorization to connect to your Zoom account. (Once connected, you’ll automatically return to the event’s Basic Information page to continue filling out the event details.)
- If you have previously connected to your Zoom account, when you click Next, you will return to the event’s Basic Information page to continue filling out the event details.
- Click Create Event.
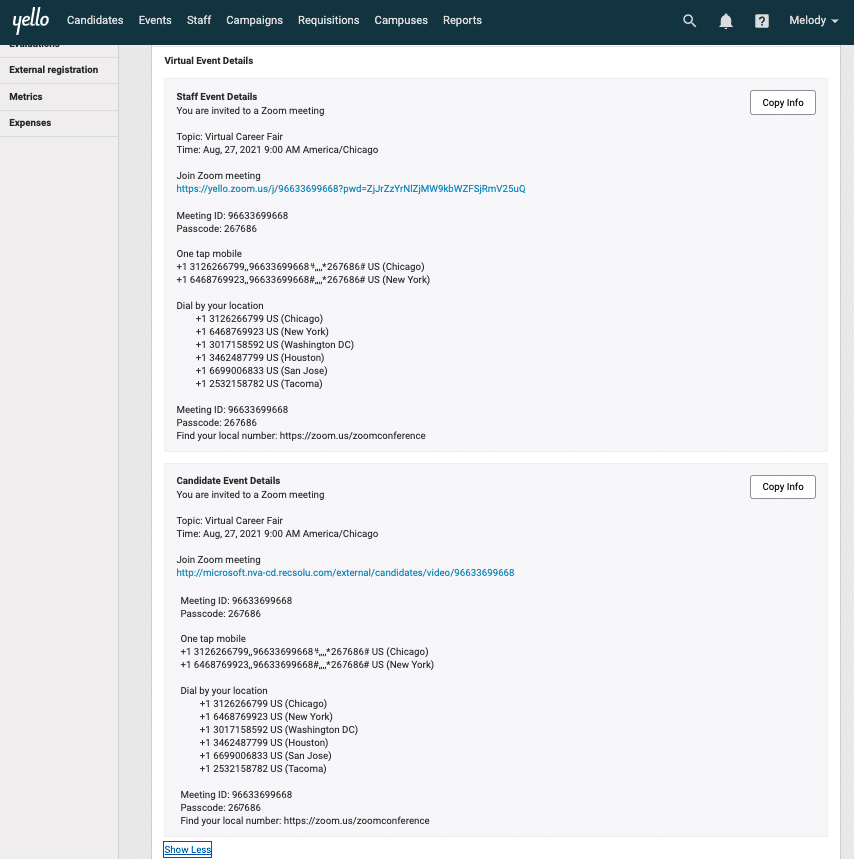
- Your virtual event has been created and the Zoom video conference details are automatically populated in Event Details > Virtual Event Details. (The Zoom Meeting or Zoom Webinar will also populate in Zoom.)
Managing Advanced Configuration Settings for Your Zoom-hosted Event
When you create your virtual event in Yello, the Zoom Meeting or Zoom Webinar settings will default to your individual meeting and webinar settings in your Zoom account. If you want to adjust Zoom settings, please sign in directly to your Zoom account after you have created the event in Yello.
- If your Zoom account supports joining the event by Telephone and Computer Audio, by default, both are enabled when the event is created in Yello. We recommend you do not change the default audio setting after your event is created to ensure the conference details captured in Yello and communicated to attendees are accurate.
Changing Your Zoom-hosted Virtual Event
If you need to change the date, time, or cancel this event, please sign-in to Yello and adjust the event directly in Yello. Reminder: If you change the event details (date, time, cancellation), you will need to send new communications to any attendees or staff you have invited to the event.
Joining Your Zoom-hosted Virtual Event
You will host the Zoom Meeting or Zoom Webinar you have created through this process the same as you would any other Zoom session – on the Zoom platform.
As a host, there are several ways you can start your meeting:
- Recommended: You click the join link from an email or calendar invitation you received from Yello.
- If you are in Yello, you may also join the session by clicking the Staff link found in the Virtual Event Details section of your event.
- As a host, you can also start your session from the Zoom desktop or mobile client. (For more information, visit Zoom.)
Candidates should join your Zoom-hosted virtual event by clicking the join link from an email or calendar invitation you sent them through Yello.
Frequently Asked Questions
How do I connect Yello to my Zoom account? Do I have to download the Yello for Zoom app from the Zoom App Marketplace?
A simple, one-time Zoom authentication step is integrated into Yello’s event creation process so you do not need to go to the marketplace to download anything.
In Yello, can I connect to Zoom using someone else’s Zoom credentials?
No. The Zoom account you connect to through Yello should be your individual corporate Zoom account. You will only have access to the Zoom features your company has licensed for your individual account. If you are not sure if you have a corporate Zoom account or what types of Zoom events you can create, consult your IT Admin.
What type of event should I select if I want to create a Zoom Meeting or a Zoom Webinar?
In the Set up virtual event step:
- Select “Interactive” as your event type if you want to create a Zoom Meeting
- Select “Broadcast” as your event type if you want to create a Zoom Webinar
What happens if I try to create a Zoom Webinar and I don’t have a webinar license on my Zoom account?
If you have not yet authorized Yello to connect to your Zoom account:
- When you try to create a Broadcast event for a Zoom Webinar, you will be returned to the Basic Information page and notified that we were not able to create the event due to insufficient permissions. Next, you can start the virtual set-up selection process again to choose another event type or platform for your event.
If you have already connected Yello to your Zoom account:
- When you try to create a Broadcast event for a Zoom Webinar, during Platform selection you will not have the option to select Zoom. At that point, you can select another event platform or go back and change event type, in order to continue creating your event.
If I change the date, time or cancel the event in Yello, what happens in Zoom?
When you change the date, time, or cancel your Zoom-hosted event through Yello, real-time updates are made to the event in your Zoom account. Reminder: If you change the event details (date, time, cancellation) you will need to send new communications through Yello to any attendees or staff you have invited to the event.
How do I deauthorize the Yello for Zoom app from my Zoom account?
Sign in to the Zoom Marketplace, go to the Manage section and navigate to the Installed Apps page. Select the Yello for Zoom app and click Uninstall.
Can I automatically create a recurring Zoom meeting series in Yello?
Not at this time. Yello for Zoom integration currently creates and syncs single events between the Yello and Zoom platforms.
What are the default Zoom Meeting or Zoom Webinar settings for the event I just created in Yello?
When you create your virtual event in Yello, the Zoom Meeting or Zoom Webinar settings will default to your individual meeting and webinar settings in your Zoom account. If you want to adjust Zoom settings, please sign in directly to your Zoom account after you have created the event in Yello.
- If your Zoom account supports joining the event by Telephone and Computer Audio, by default, both are enabled when the event is created in Yello. We recommend you do not change the default audio setting after your event is created to ensure the conference details captured in Yello and communicated to attendees are accurate.
Does this work with our Zoom Single Sign On?
Yello’s authentication process does not affect a customer’s single sign-on process. If the user is currently signed in to Zoom, when they reach the authentication process, they will not be asked to sign in again. However, if the user is not signed in to Zoom, during the authentication process they will be presented with a Zoom sign-in window where they should enter their Zoom account credentials and continue to the authentication window.